1. Create an account
Go to runsheet.show/sign-up and sign up with Google or an email address. Only the rundown owner needs an account: the crew, stage, and any other screens that watch the show later connect through share links with no sign-in of their own (see Share links, screens, and plans).
2. Create a rundown
After signing in you land on the dashboard. Click New rundown and the editor opens. Give the rundown a title at the top, and set the show start time — the wall-clock time the event is planned to begin. Every start time in the rundown is calculated from this anchor, so if the venue moves your slot from 9:00 to 9:30, changing this one field moves the whole schedule.
On the free plan you can have 1 active rundown at a time. A rundown stays “active” until its show has been ended, so finishing a show frees the slot for the next event.
3. Add and edit rows
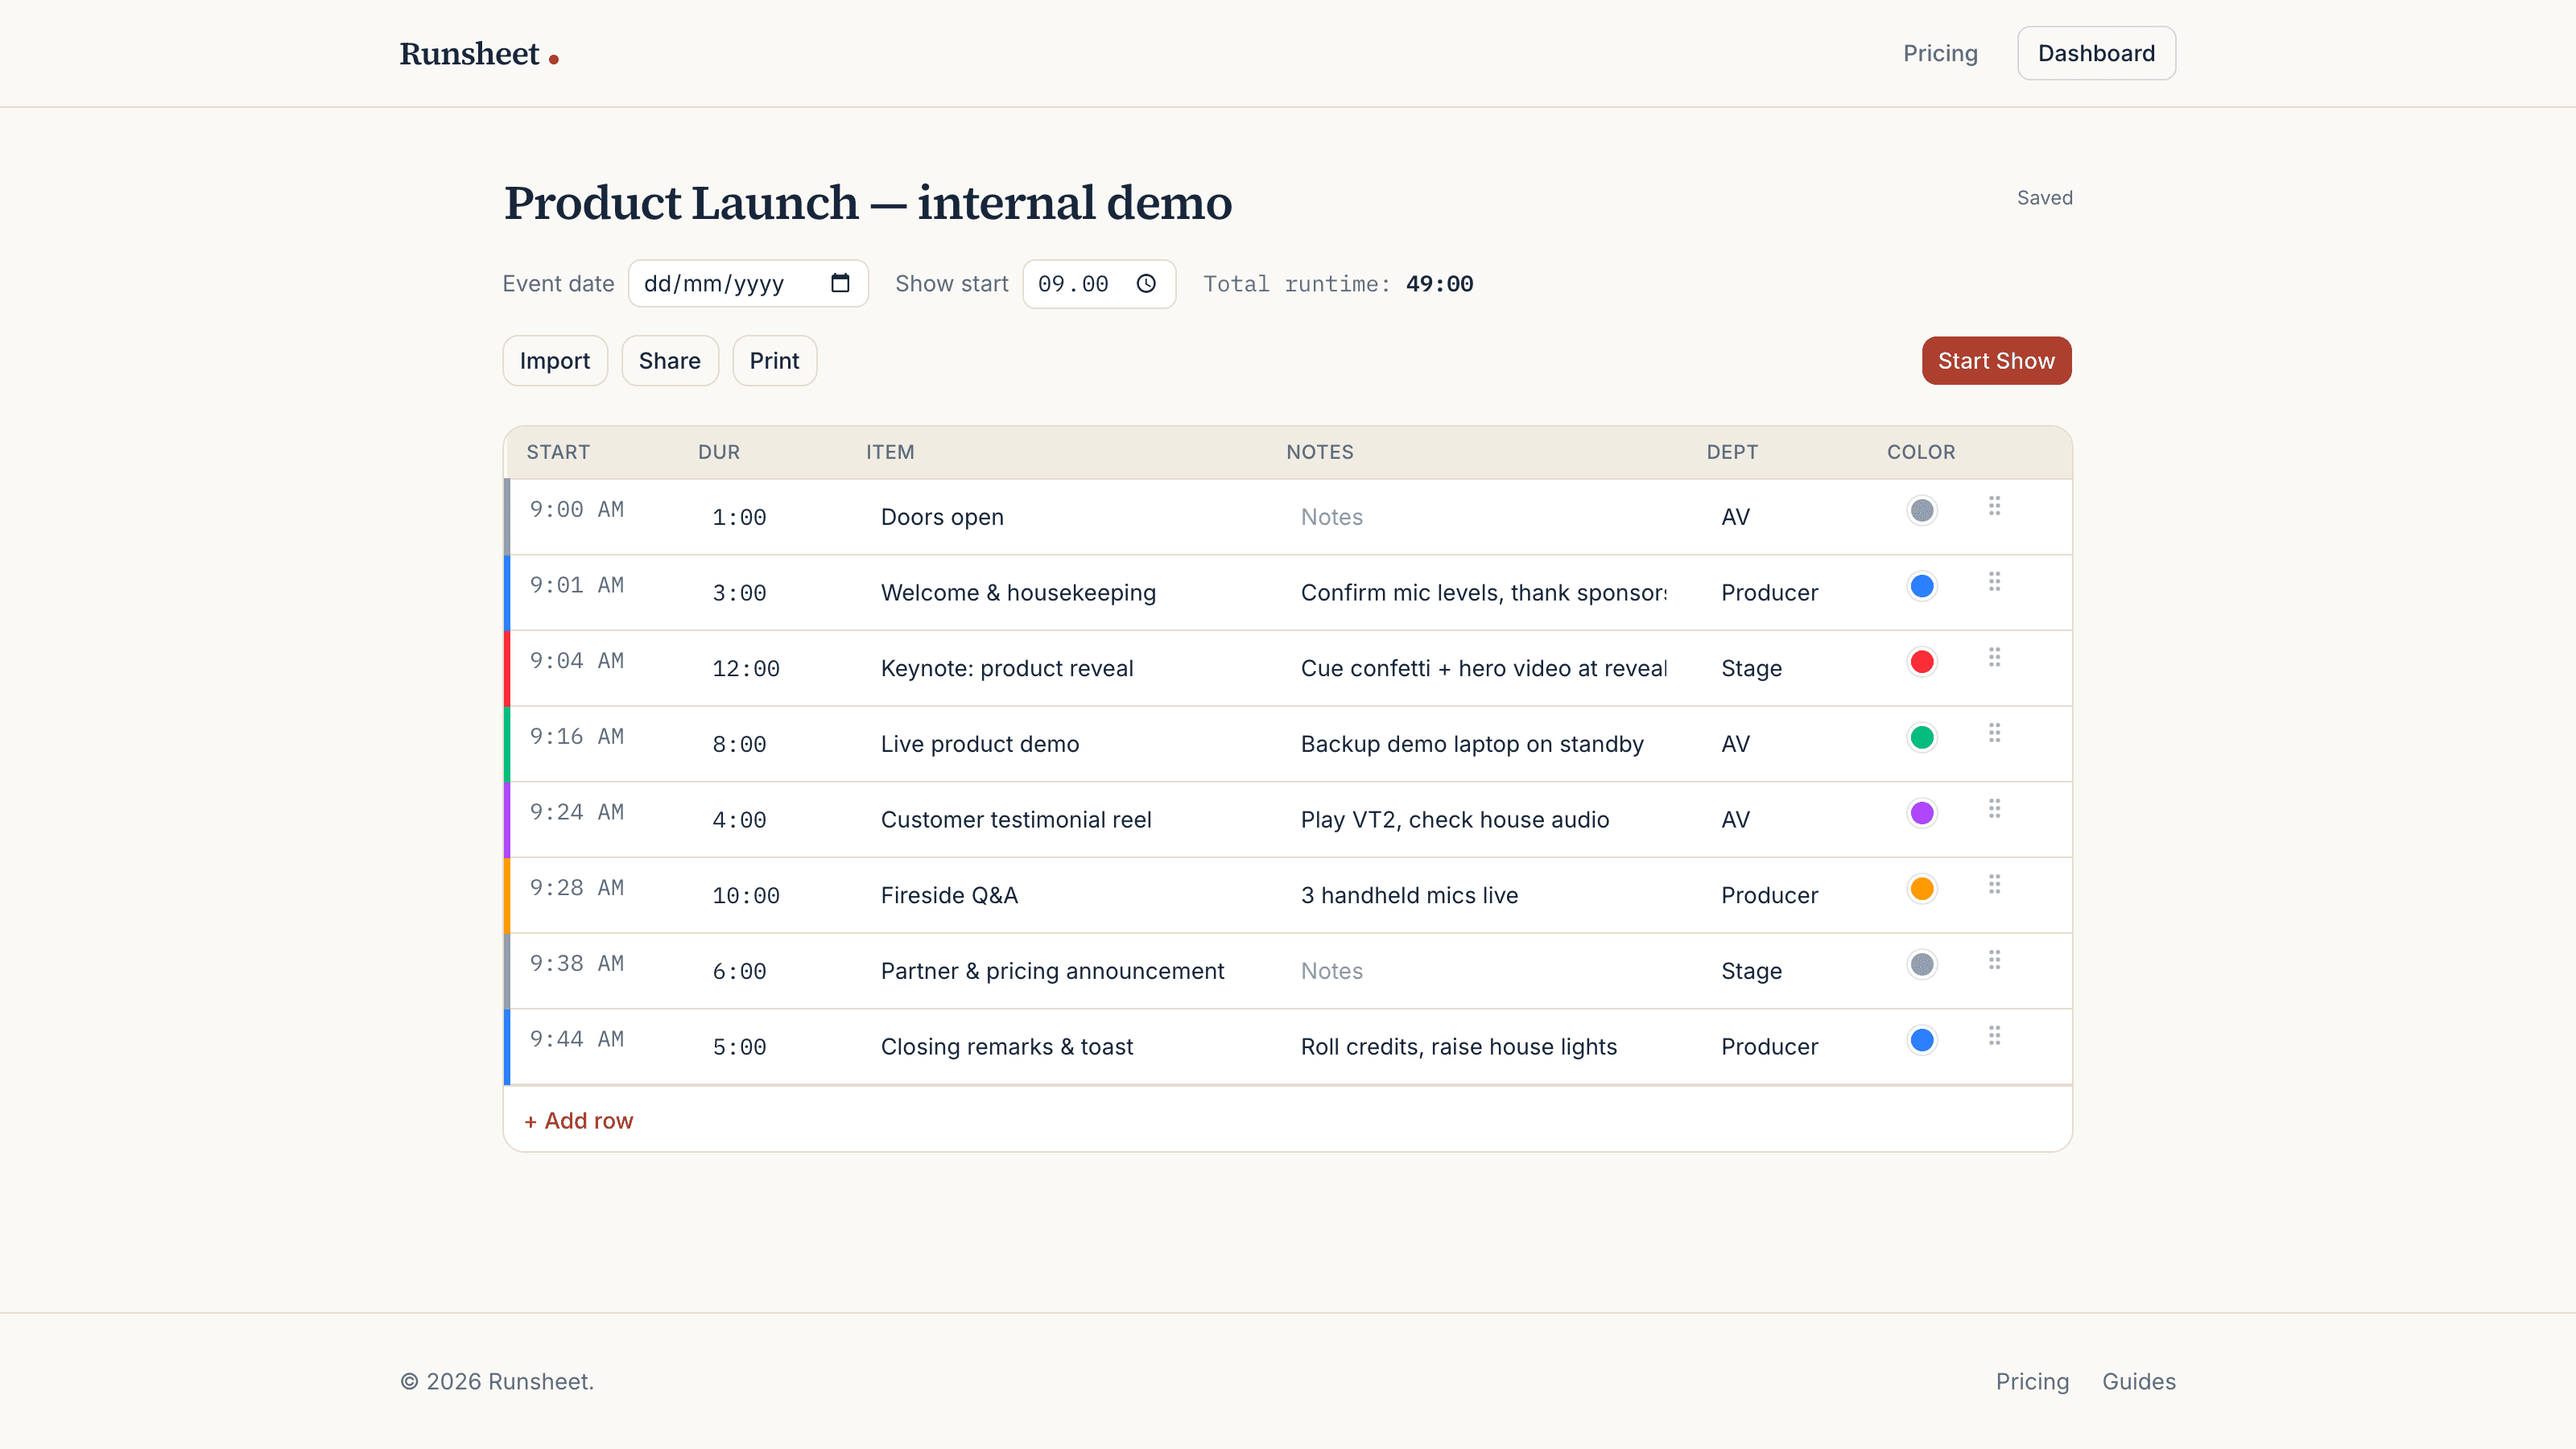
Each row is one segment of the show: a title, a duration, optional notes (cues, AV instructions), an owner or department tag, and an optional color. The important mechanic:
- You never type start times.A row’s start time is derived from the show start plus the durations of everything above it. Edit one duration and every start time after it updates instantly. This is the same “reflow” that later runs live during the show.
- Durations accept three formats: a bare number is minutes (
5= 5 minutes),1:30is one minute thirty seconds, and1:05:00is one hour five minutes. - Drag rows to reorder them. Times reflow to match the new order.
- Everything autosaves. Edits are saved automatically a moment after you stop typing; a saving/saved indicator shows the current state. There is no Save button.
4. Import from a spreadsheet
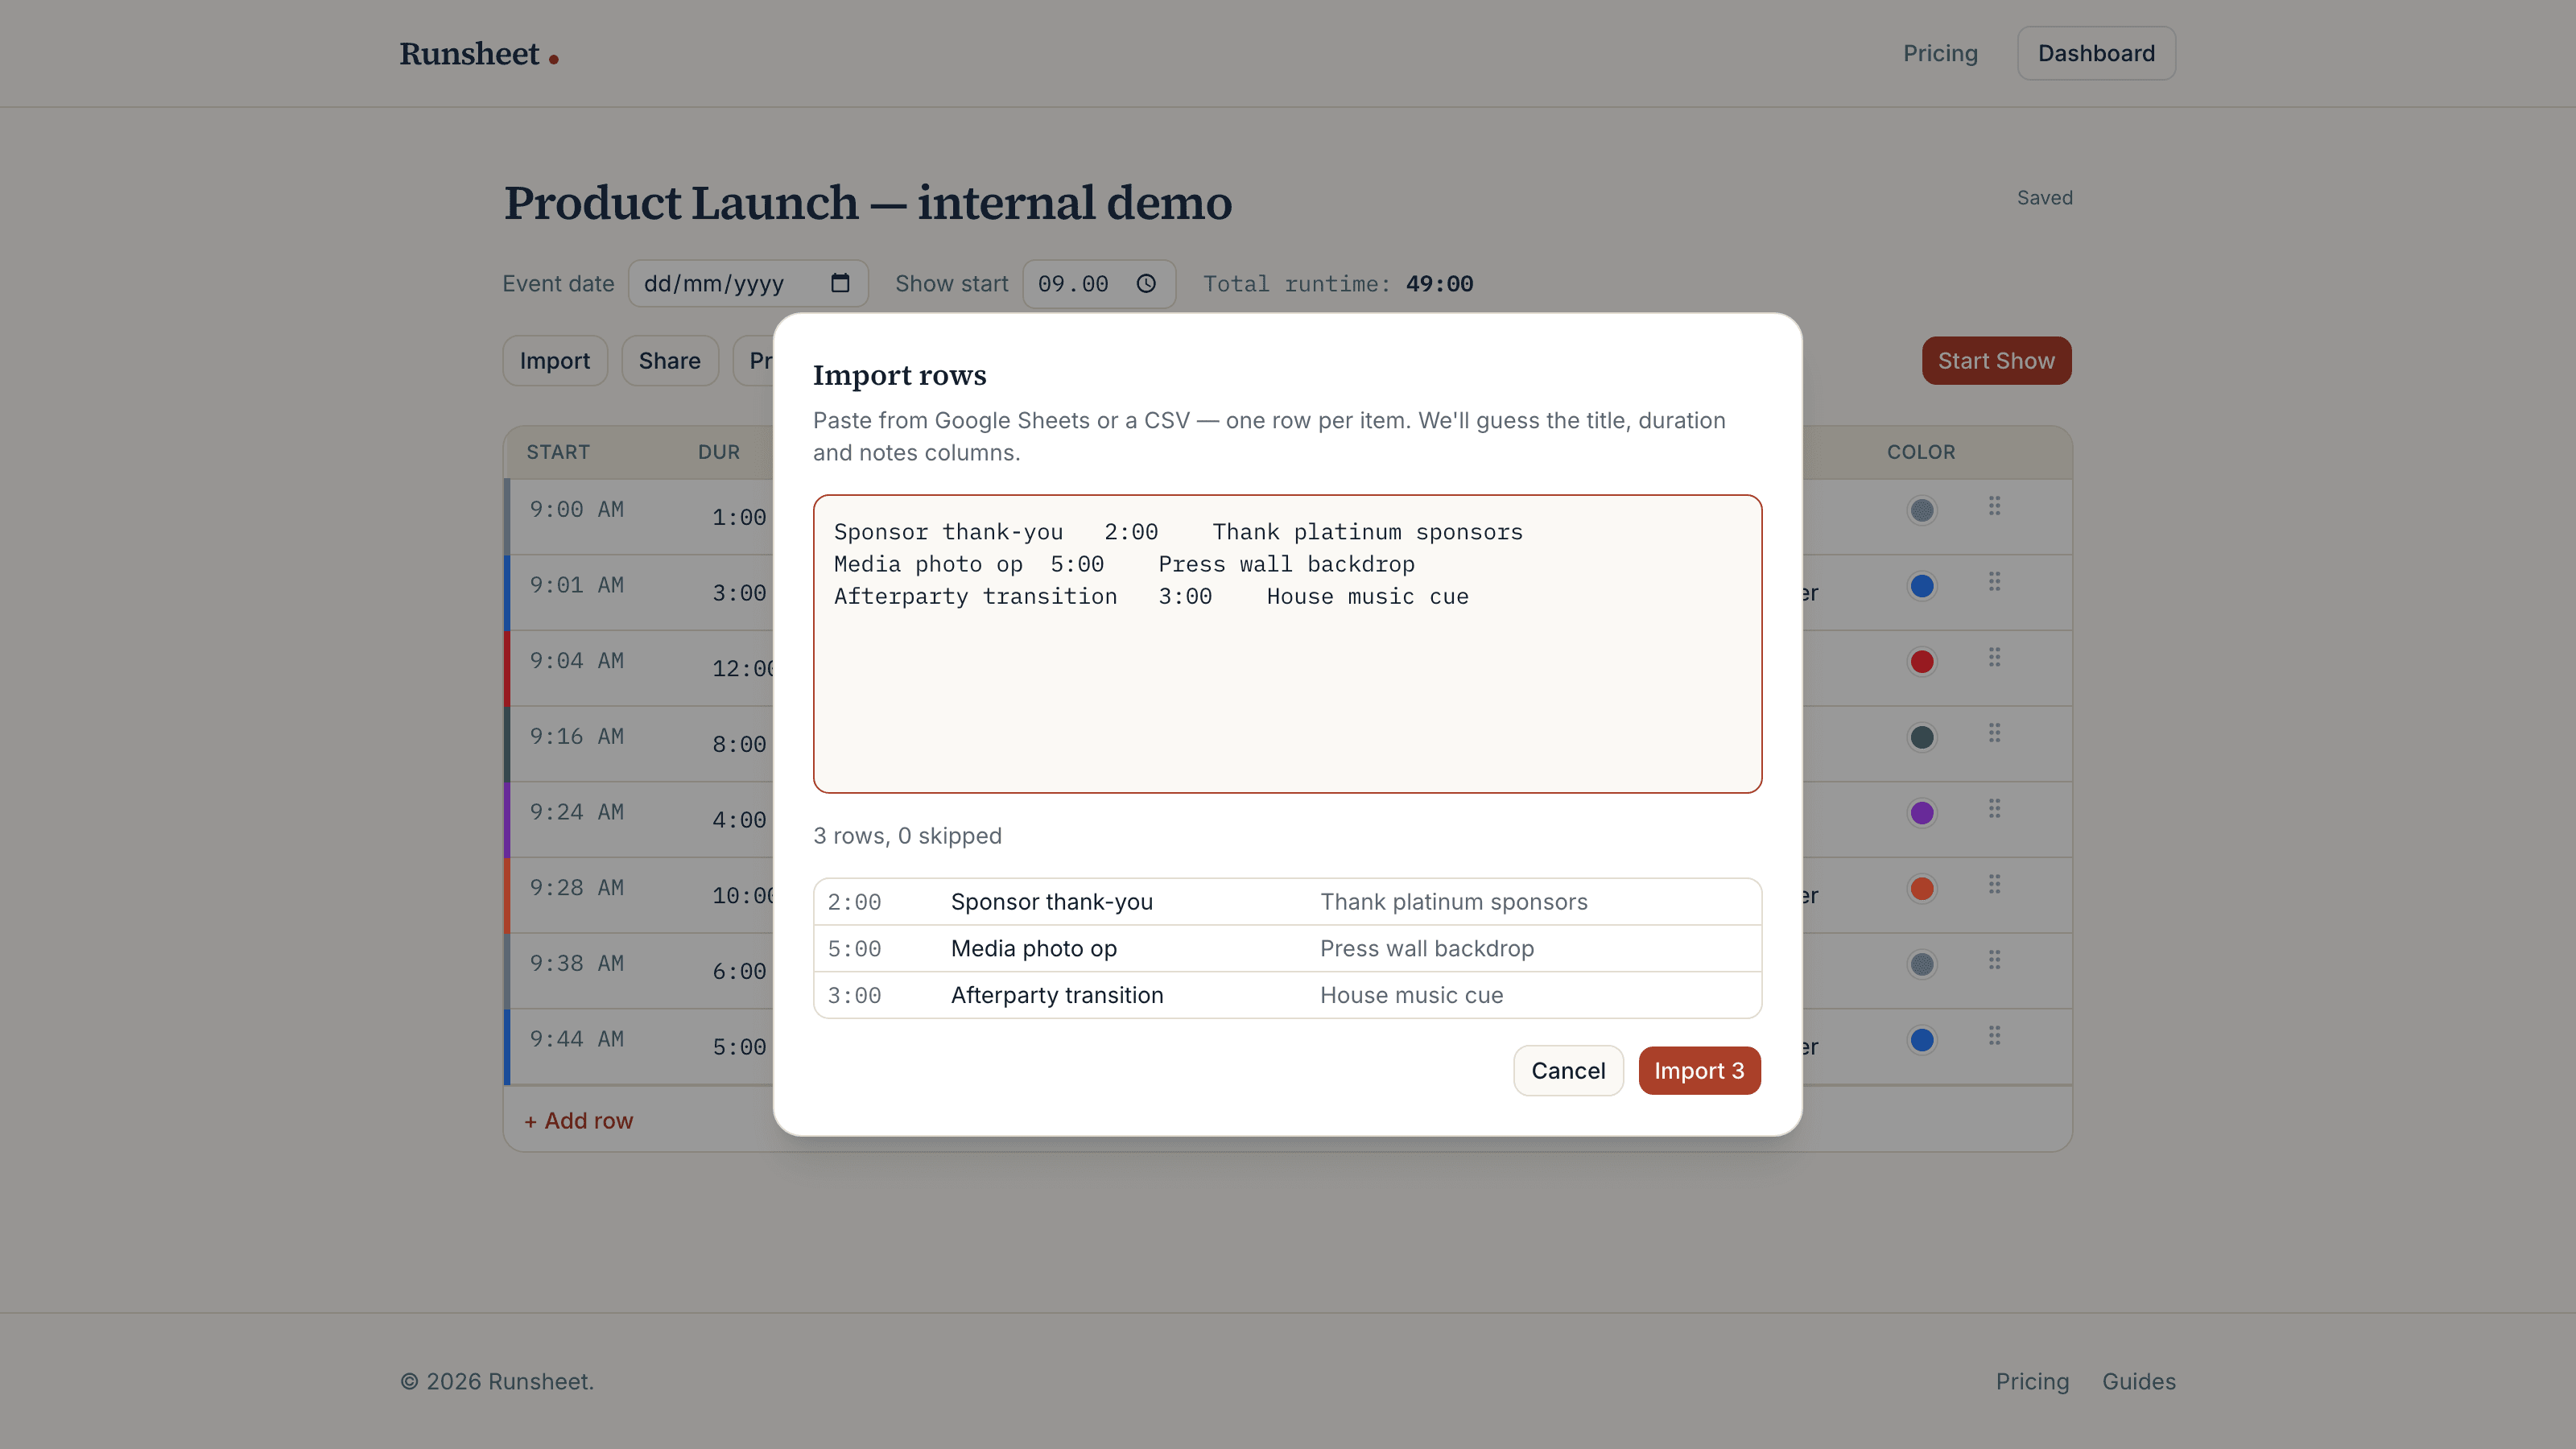
If the schedule already exists in Google Sheets, Excel, or a CSV, you don’t need to retype it. Click Import in the editor, copy the rows in the spreadsheet, and paste them into the dialog — one spreadsheet row per rundown item. Runsheet guesses which columns are the title, duration, and notes, shows a preview of every row it parsed (and a count of rows it skipped), and only writes anything when you confirm the import.
5. Print or export a PDF
The Printbutton in the editor opens a print-ready view of the rundown. Use the browser’s print dialog to send it to paper or save it as a PDF. Crews that want a paper copy taped to the desk get exactly what the screens show, with the computed start times.
6. Share the screens
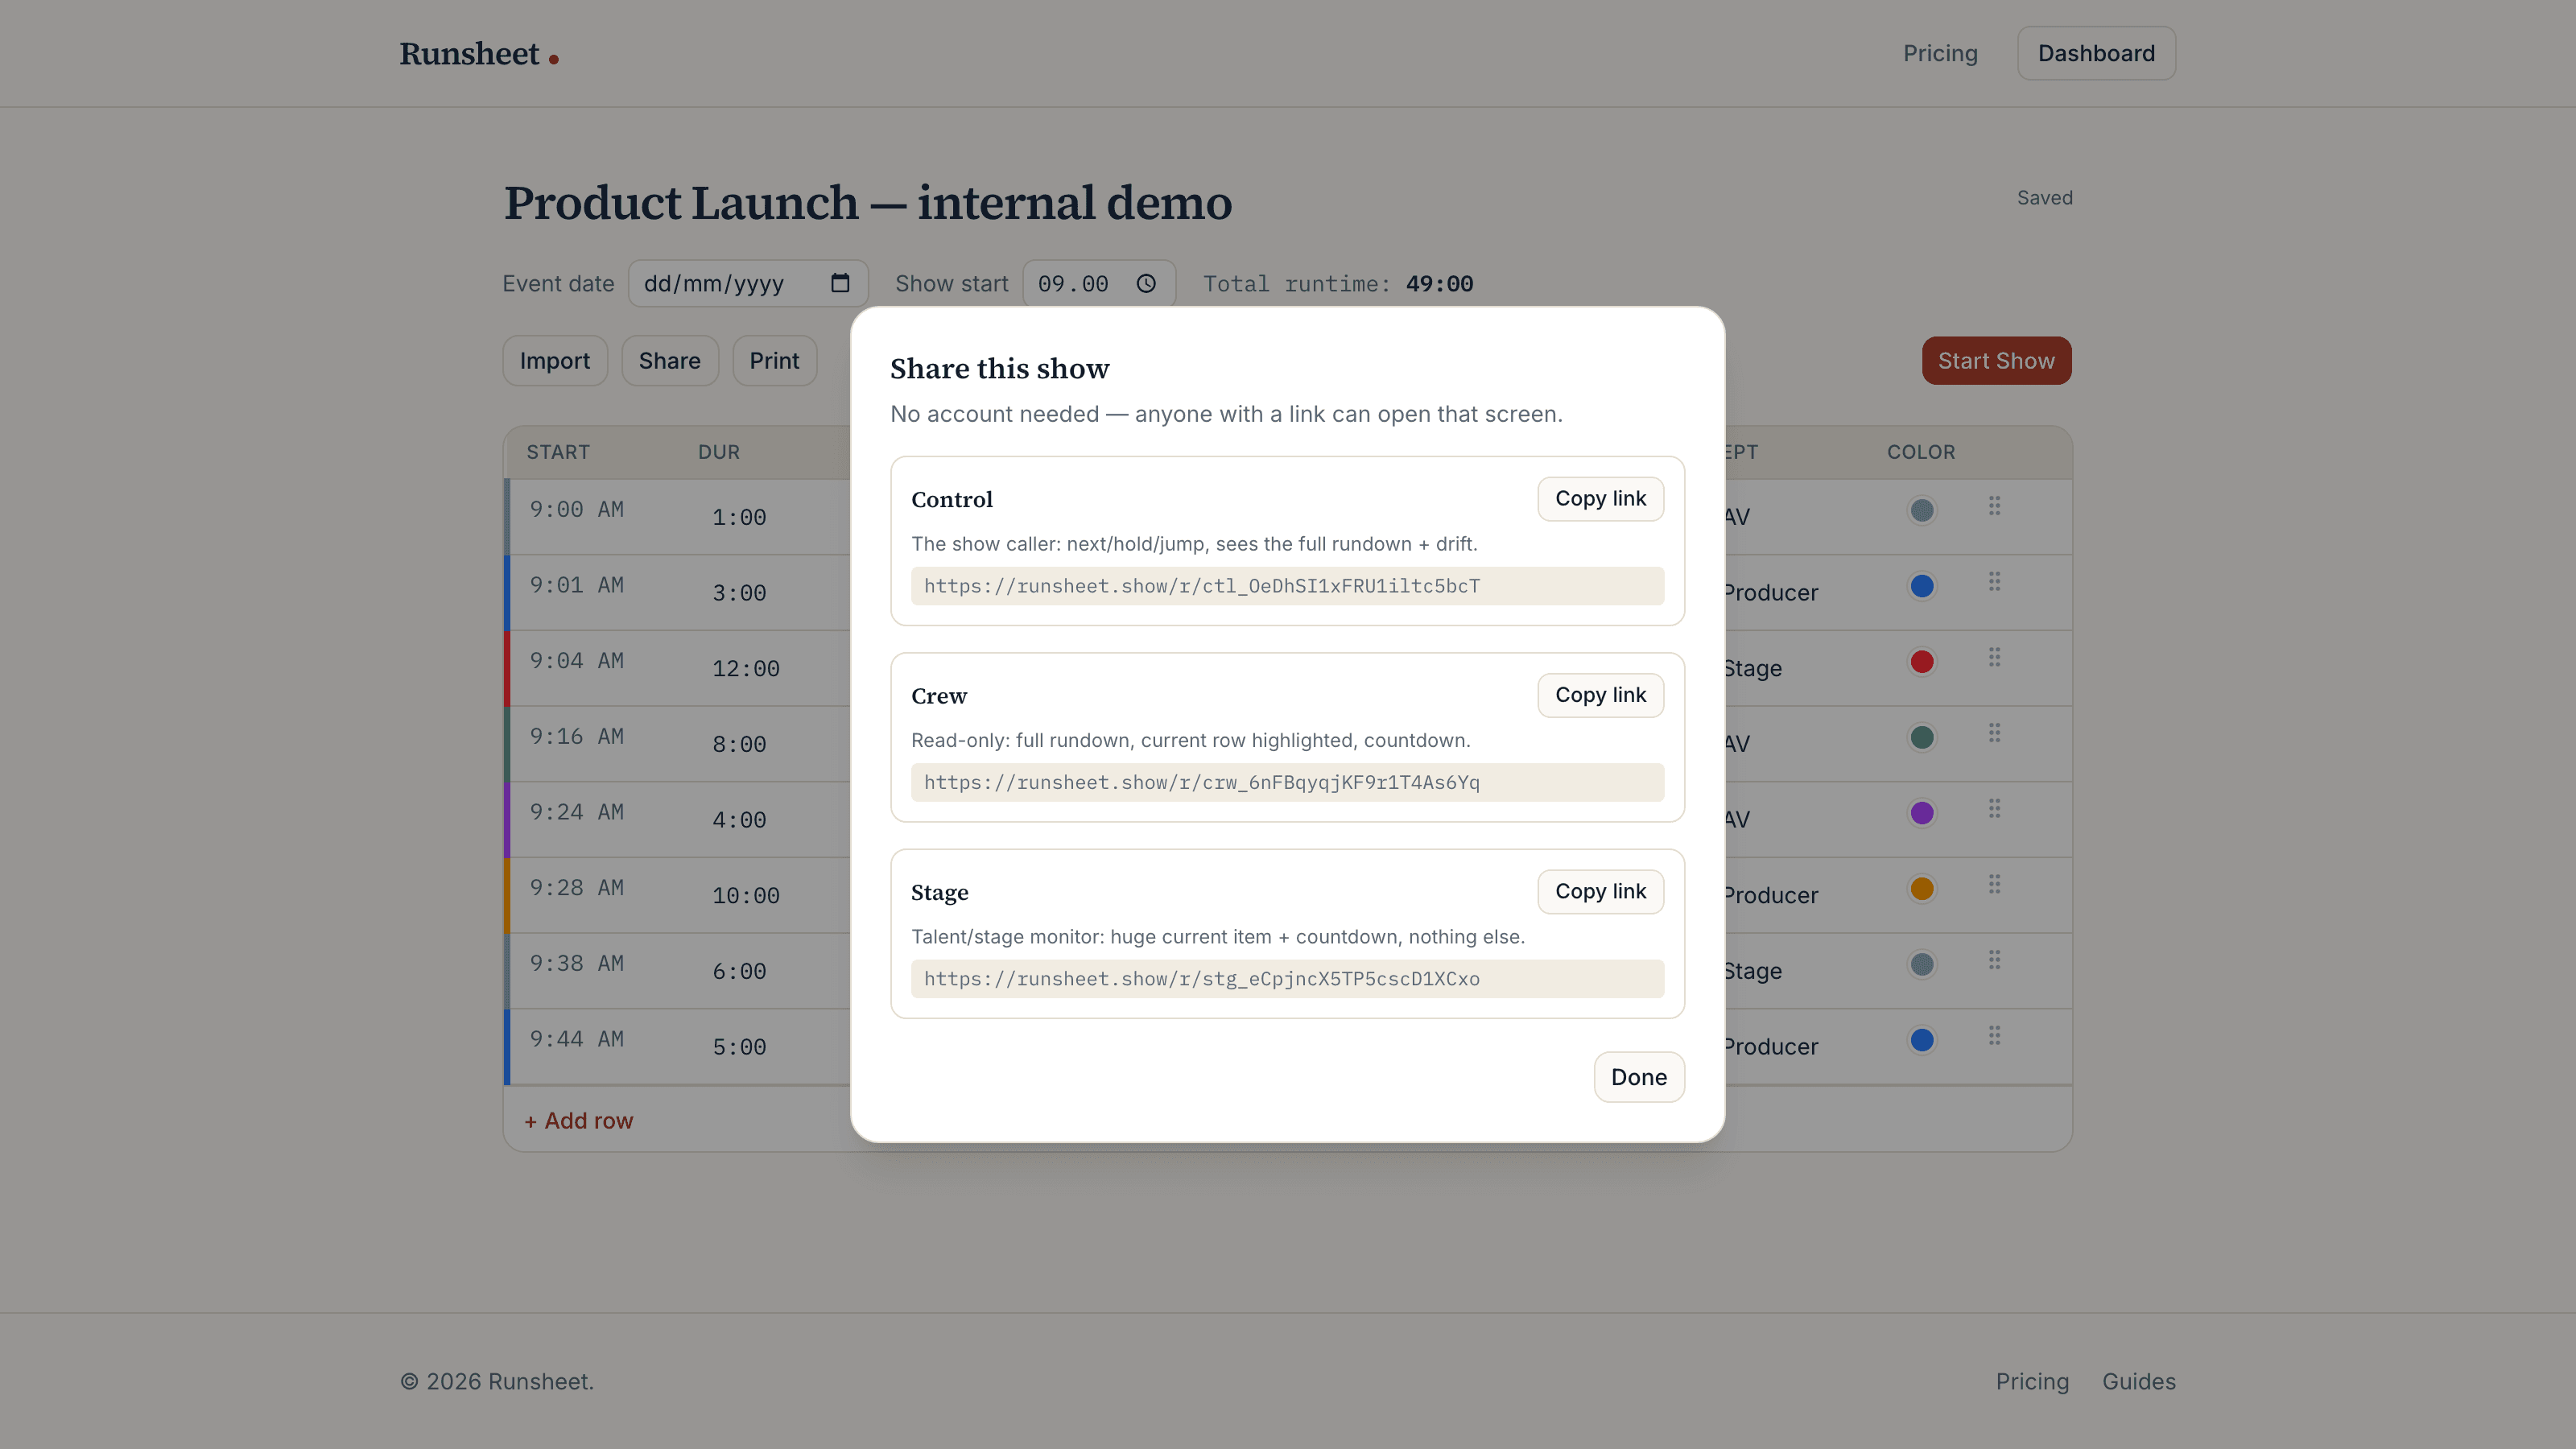
Open the Share dialog to get three links, one per audience:
- Control— the show caller’s screen: the full rundown plus the Start/NEXT/Hold/End controls and the drift indicator. Treat this link like a key; anyone who has it can drive the show.
- Crew — read-only: the full rundown with the current row highlighted and the countdown.
- Stage — a monitor view for talent: the current item and countdown, huge, and nothing else.
Send each link to the people who need that view. They open it in any browser — laptop, tablet, phone — and are connected.
7. Run the show
On show day, open the rundown (or the control link) and press Start Show. From that moment every connected screen tracks the same state in real time: the current item, the countdown, and start times that move when the schedule slips. The controls — NEXT, jumping to a row, Hold/Resume, messages to screens, and End Show — are covered in Live mode and time reflow.